DIY Lampshade Ideas for Creative Updates are an excellent way to give a new look to an old lamp. Lampshades are an essential part of any lighting fixture, and they can make a significant impact on the overall appearance of a room. With a little creativity and some DIY skills, you can transform an ordinary lampshade into a unique and eye-catching piece.
There are many different DIY Lampshade Ideas for Creative Updates that you can try. One popular option is to use fabric to cover a lampshade. This can be a great way to add color and pattern to a room, and it’s easy to do with just a few basic supplies. Another idea is to use paint to create a custom design on a lampshade. This can be a fun and creative way to add a personal touch to your lighting fixtures.
Whether you’re looking for a way to update an old lamp or you just want to add some personality to your home decor, DIY Lampshade Ideas for Creative Updates are a great option. With so many different techniques and materials to choose from, you’re sure to find a project that’s perfect for your style and skill level.
Understanding Lampshade Structures

Lampshades come in a variety of shapes and sizes, each with its own unique structure. Understanding the structure of a lampshade is essential to creating a DIY lampshade that fits perfectly on your lamp and enhances the overall look of the room.
Frame
The frame of a lampshade is the base structure that gives the shade its shape. It is typically made of metal or plastic and can be shaped into a variety of forms, including cylindrical, conical, and bell-shaped. The frame is covered with a fabric or material that diffuses the light and creates the desired effect.
Fabric
The fabric of a lampshade is an essential element that determines the overall look and feel of the shade. It is available in a variety of materials, including cotton, silk, linen, and paper. The fabric can be plain or patterned, and the choice of fabric can significantly impact the amount of light that passes through the shade.
Fitting
The fitting of a lampshade refers to the way it attaches to the lamp base. There are two main types of fittings: spider and clip-on. Spider fittings have a metal frame that sits on top of the lamp base, while clip-on fittings clip directly onto the light bulb. It is important to choose the correct fitting to ensure that the lampshade sits securely on the lamp base.
Size
The size of a lampshade is determined by its height, width, and depth. The size of the lampshade should be in proportion to the lamp base and the room in which it will be used. A lampshade that is too small or too large can look out of place and detract from the overall aesthetic of the room.
In summary, understanding the structure of a lampshade is essential to creating a DIY lampshade that fits perfectly on your lamp and enhances the overall look of the room. The frame, fabric, fitting, and size are the key elements to consider when choosing or creating a lampshade.
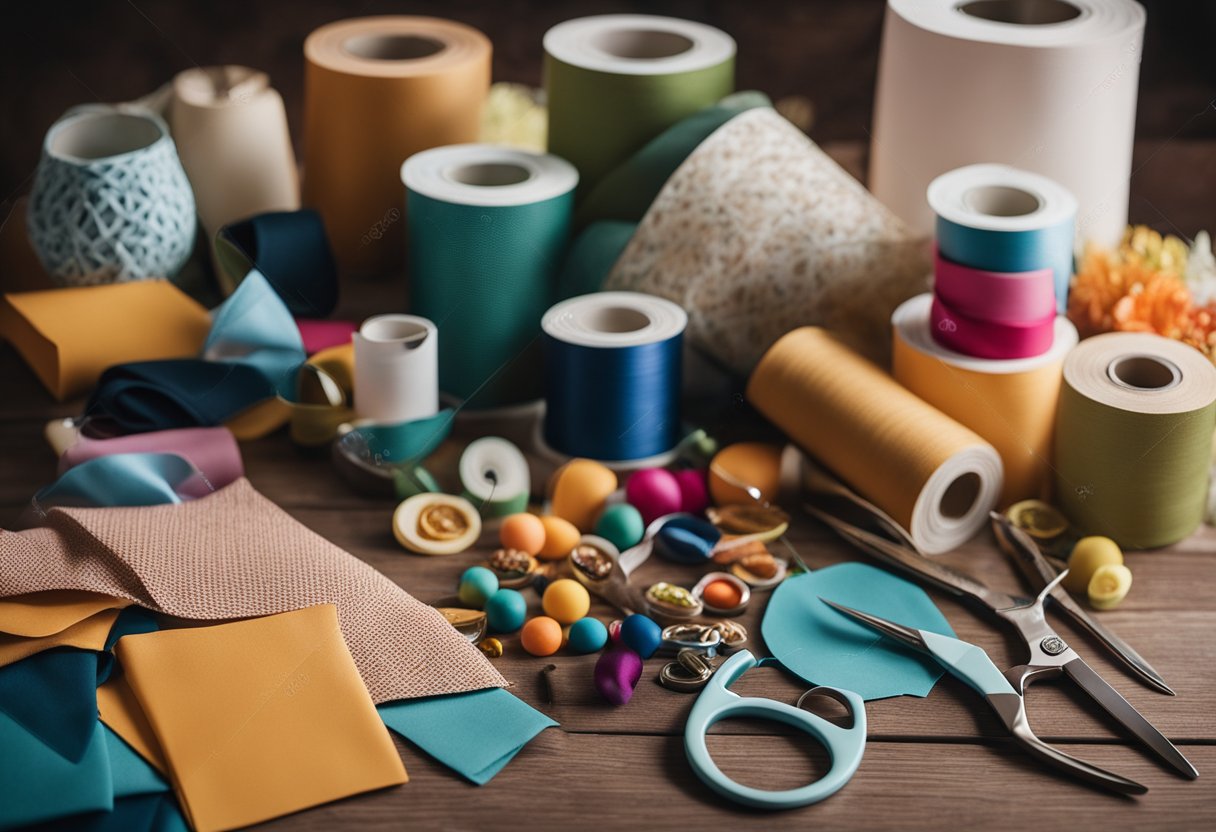
Materials and Tools for DIY Lampshades

To create DIY lampshades, one needs to have the right materials and tools. The materials and tools needed for making lampshades vary depending on the design and style of the lampshade. Here are some of the common materials and tools that one can use to make DIY lampshades.
Materials
- Lampshade Frames: Lampshade frames are the foundation of any lampshade. They come in different shapes and sizes, and one can choose the frame depending on the design and size of the lampshade they want to create.
- Fabric: Fabric is an essential material for making lampshades. One can choose from different types of fabrics, such as cotton, silk, linen, or even recycled materials like old t-shirts or jeans.
- Adhesive: Adhesive is necessary to hold the fabric onto the lampshade frame. One can use glue, double-sided tape, or spray adhesive.
- Trimmings: Trimmings are optional but can add a decorative touch to the lampshade. One can use trims like ribbons, lace, or even beads.
Tools
- Scissors: Scissors are essential for cutting the fabric to the right size and shape.
- Pliers: Pliers are used to bend and shape the lampshade frame.
- Needle and Thread: Needle and thread are used to sew the fabric onto the lampshade frame.
- Paintbrush: A paintbrush is used to apply adhesive to the lampshade frame.
- Utility Knife: A utility knife is used to trim the excess fabric from the lampshade.
With these materials and tools, one can create unique and personalized lampshades that match their home décor.
Basic DIY Lampshade Techniques

There are several basic DIY lampshade techniques that can be used to update an old lampshade or create a new one from scratch. These techniques include:
1. Painting
Painting a lampshade is an easy way to add color and personality to a room. To paint a lampshade, first, clean the surface of the shade with a damp cloth and let it dry completely. Then, apply a base coat of paint using a brush or spray paint. Once the base coat is dry, add any additional designs or patterns using stencils, tape, or freehand painting.
2. Covering
Covering a lampshade with fabric, paper, or other materials is another simple way to update its look. To cover a lampshade, first, measure the height and circumference of the shade and cut the covering material to size. Then, apply adhesive to the back of the covering material and carefully wrap it around the shade, smoothing out any wrinkles or bubbles as you go.
3. Embellishing
Embellishing a lampshade with beads, sequins, ribbon, or other decorative items is a great way to add texture and interest to a room. To embellish a lampshade, first, choose the decorative items you want to use and lay them out in the desired pattern. Then, use glue or thread to attach the items to the lampshade, being careful not to damage the shade or the electrical components.
4. Dyeing
Dyeing a lampshade is a fun way to create a unique, ombre effect. To dye a lampshade, first, mix the dye according to the instructions on the package. Then, dip the shade into the dye, holding it in the mixture for a few minutes to achieve the desired color intensity. Finally, hang the shade to dry completely before using it.
By using these basic DIY lampshade techniques, anyone can create a custom lampshade that reflects their personal style and adds a unique touch to their home decor.
Creative Lampshade Ideas

Lampshades are an easy and affordable way to update the look of a room. With a little creativity, you can customize your lampshade to match your decor or add a unique touch to your space. Here are some creative lampshade ideas to inspire your next DIY project.
Fabric and Textile Customization
One way to customize your lampshade is by adding fabric or textile. You can use fabric paint to create patterns or designs on a plain lampshade, or you can cover the lampshade with fabric or lace to add texture. You can also use ribbon, twine, or other materials to add embellishments to your lampshade.
Painted Lampshade Designs
Another way to update your lampshade is by painting it. You can use stencils to create patterns or designs, or you can freehand paint a custom design. Metallic paint or spray paint can add a modern touch to a plain lampshade. You can also use chalk paint to create a shabby chic look.
Upcycling Objects into Lampshades
You can upcycle objects into lampshades to add a unique touch to your space. For example, you can use old books, maps, or sheet music to create a lampshade. You can also use natural materials like leaves or branches to create a nature-inspired lampshade. The possibilities are endless!
Themed Lampshade Creations
Themed lampshades can add a fun touch to a room. For example, you can create a lampshade with a sports theme or a lampshade with a beach theme. You can use fabric, paint, or other materials to create the theme.
Nature-Inspired Lampshades
Nature-inspired lampshades can add a calming and natural touch to a room. You can use natural materials like twigs, leaves, or flowers to create a lampshade. You can also use fabric or paint to create a nature-inspired design.
In conclusion, there are many creative lampshade ideas to choose from. Whether you want to add fabric, paint, or natural materials to your lampshade, there are endless possibilities to customize your lampshade to match your decor or add a unique touch to your space.
Step-by-Step Lampshade Projects

Here are four step-by-step lampshade projects that are easy to follow and can be completed in a short amount of time. These projects range from minimalist to rustic, so there’s something for everyone.
Minimalist Lampshade
For a minimalist lampshade, start with a plain white or cream-colored lampshade. Then, using a sharpie or paint pen, draw simple geometric shapes or lines onto the shade. This can be done freehand or with the help of stencils. Once the design is complete, let the ink dry completely before using the lamp.
Bohemian Style Lampshade
For a bohemian style lampshade, start with a plain white or cream-colored lampshade. Then, using a hot glue gun, attach various trims, tassels, and pom poms to the bottom edge of the shade. You can use a single color or mix and match different colors and textures. Once the glue has dried, the lampshade is ready to use.
Industrial Chic Lampshade
For an industrial chic lampshade, start with a plain white or cream-colored lampshade. Then, using a drill, make small holes evenly spaced around the top and bottom edges of the shade. Next, thread thin wire or metal chain through the holes, creating a cage-like effect around the shade. This lampshade looks great with an Edison bulb.
Rustic Lampshade
For a rustic lampshade, start with a plain white or cream-colored lampshade. Then, using a hot glue gun, attach twigs or small branches to the bottom edge of the shade. You can use a single type of twig or mix and match different types for a more eclectic look. Once the glue has dried, the lampshade is ready to use.
These step-by-step lampshade projects are great for updating old lampshades or adding a personal touch to a new one. With a little creativity and some basic supplies, anyone can create a lampshade that is both functional and stylish.
Lighting Effects and Lampshade Functionality

Lampshades not only add style to a room, but they also serve a functional purpose by controlling the amount and direction of light emitted from a lamp. Different lampshade designs can create various lighting effects, making them an essential element in interior design.
A drum lampshade is a popular choice for its simplicity and versatility. It diffuses light in all directions, creating a warm and inviting atmosphere. A tapered lampshade, on the other hand, directs light downwards, making it ideal for task lighting. A bell-shaped lampshade, with its narrow top and flared bottom, provides both ambient and task lighting.
In addition to the shape, the material of a lampshade can also affect the lighting effect. A sheer or translucent lampshade allows more light to pass through, creating a soft and gentle glow. A solid or opaque lampshade, on the other hand, creates a more focused and intense lighting effect.
When choosing a lampshade, it is important to consider the lamp’s purpose. A lamp used for reading or working requires a lampshade that directs light downwards, while a lamp used for ambiance requires a lampshade that diffuses light in all directions.
In summary, lampshades are not only decorative elements in a room, but they also serve a functional purpose by controlling the amount and direction of light emitted from a lamp. Different lampshade designs can create various lighting effects, making them an essential element in interior design.
Safety Tips for DIY Lampshade Projects

When it comes to DIY lampshade projects, safety should always be a top priority. Here are some tips to help ensure that your project is both fun and safe:
1. Choose the Right Materials
When selecting materials for your DIY lampshade project, be sure to choose materials that are safe for use with light bulbs. Avoid using materials that are flammable or that could melt under the heat of a light bulb.
2. Use Protective Gear
When working with certain materials, such as hot glue or paint, it’s important to wear protective gear to prevent burns or skin irritation. Gloves, goggles, and a mask can all help protect you while you work.
3. Follow Instructions Carefully
When using tools or working with electrical components, it’s important to follow instructions carefully. Be sure to read the instructions that come with your tools and materials, and follow all safety precautions.
4. Work in a Well-Ventilated Area
Many DIY lampshade projects involve the use of chemicals or other materials that can produce fumes. To avoid breathing in these fumes, it’s important to work in a well-ventilated area. Open windows or use a fan to help circulate fresh air.
5. Keep Children and Pets Away
DIY lampshade projects can be fun for the whole family, but it’s important to keep children and pets away from your work area. Hot glue guns, sharp tools, and electrical components can all be dangerous for curious little hands.
By following these safety tips, you can help ensure that your DIY lampshade project is both fun and safe.
Troubleshooting Common Lampshade DIY Issues

DIY lampshade projects can be fun and rewarding, but they can also be frustrating if you encounter problems along the way. Here are some common issues that DIYers may face and some tips on how to troubleshoot them.
Problem: Wrinkled or Bumpy Fabric
If your lampshade fabric is wrinkled or bumpy, it can be difficult to get a smooth, professional-looking finish. This can be caused by a number of factors, including using the wrong type of fabric or not stretching the fabric tightly enough.
Solution: Make sure you are using a fabric that is suitable for lampshades, such as cotton or linen. Avoid using fabrics that are too thick or stiff. When attaching the fabric to the lampshade frame, make sure you stretch it tightly and smooth out any wrinkles or bumps as you go.
Problem: Uneven Glue Lines
If your lampshade has uneven glue lines, it can be unsightly and make the shade look unprofessional. This can happen if you apply too much or too little glue, or if you don’t apply it evenly.
Solution: Use a glue gun with a fine tip to apply the glue in a thin, even line. Start at one end of the lampshade and work your way around, applying the glue as you go. Make sure you don’t apply too much glue, as this can cause the fabric to bunch up.
Problem: Crooked or Uneven Lampshade
If your lampshade is crooked or uneven, it can be difficult to get it to sit straight on the lamp base. This can be caused by a number of factors, including not cutting the fabric straight or not attaching it to the frame evenly.
Solution: When cutting your fabric, make sure you cut it straight and even. Use a ruler or straight edge to help you achieve a straight line. When attaching the fabric to the frame, make sure you do so evenly and smoothly. Check the alignment of the lampshade as you go, adjusting it as needed to ensure it is straight and even.
By following these tips, you can troubleshoot common DIY lampshade issues and achieve a professional-looking finished product.
Finishing Touches and Detail Work

Once the DIY lampshade is assembled, it’s time to add the finishing touches and detail work that will take it to the next level. These small details can make a big impact on the overall look and feel of the lampshade.
One way to add detail is by using trim or ribbon. Adding a ribbon or trim around the top and bottom edges of the lampshade can create a polished and finished look. For a more playful and whimsical look, try using pom-pom trim or tassels.
Another way to add detail is by painting or stenciling the lampshade. This can be done with a variety of materials such as fabric paint, spray paint, or even acrylic paint. Stenciling can be a fun way to add patterns or designs to the lampshade.
Lastly, consider adding texture to the lampshade. This can be done by using materials such as burlap, lace, or even feathers. Adding texture can create depth and interest to the lampshade.
Overall, the finishing touches and detail work of a DIY lampshade can take it from basic to beautiful. With a little creativity and attention to detail, a DIY lampshade can become a unique and personalized addition to any room.